Feeds:
Posts
Comments

There wasn’t a lot of rubbish in the wheelie bin a few weeks ago.  That doesn’t seem to happen very often around these parts, so when it does, R takes the opportunity to mentally sort through items in the house to decide what needs to be thrown out. He always makes sure to tell me there is space in the bin ,just in case there is an extra bag of rubbish, or something, hiding in the craft room. (Tui ad anyone?)

This time, however, as we were laying in bed about to go to sleep, he says, “What about the kids’ little rocking chair? I think it’ll fit in the bin. ”

My head snapped sideways as a shocked gasp sounded from my gaping mouth.

“What? Are you high? The kids love that chair!”

“Do they even use it?”

Blank stare. Is he serious?

“Only every single day!”

So, I offered to recover it.

*Queue insanity*

“It’s small.  It’ll be easy to re-cover.  I’ll just get some new foam and K11 can come with me and pick out some fabric, and it’ll be like new again.”

“Hmm. Well, ok.”  The hesitation and tone of R’s voice was cynical.

*Moves forward in the queue, slowly, but surely.*

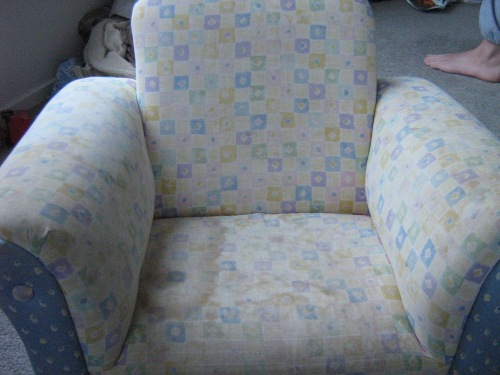
So, this is what I had to work with.

Gross, isn’t it?!  Can you see that nasty stain on the left side of the seat cushion? That would be chocolate milk.  What are the other stains, you ask? Well, if you have to ask, you must not have children. Children are dirty and gross and those foul stains and marks are sincere signs of love for this chair, made by children who have sat, ate, drank chocolate milk and who knows what else during the course of its nine-year life over two countries. It has been well-loved.

It’s a far cry from this, which is how it looked when K11 received it for her 2nd birthday from my brother.

Yes, yes, it’s soooooooooooooooooo not that chair any more.

So, me in my wisdom, in an effort to put at least one less item into the city tip, began my little upholstery adventure.

Adventure is a bit of an understatement, I might add.

It began like most of my projects where I just jumped in with both feet and no life-preserver. I began to dismantle it, bit by bit. Because I was going to use the same frame, I had to remove as many staples as I could so that the news ones would be easier to install. Slowly, staple by agonizing staple, I pulled and plucked and dug and pried and groaned and cursed and screamed.

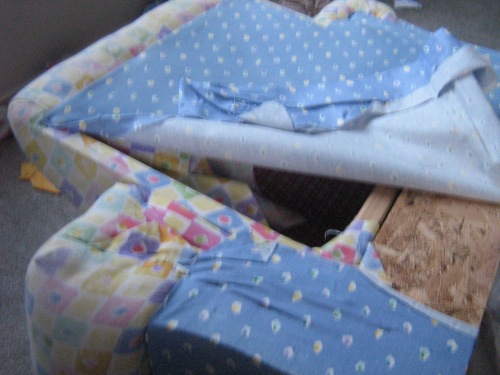
Until I got to this point, at which I placed my already sore hands onto my head and pulled my hair in frustration.

What’s wrong with it, you ask?  Well, the seat back was installed AFTER it had been covered. And it was installed with godzilla-sized furniture staples. Fifteen of them to be exact.

So, I grabbed the wine bottle, and got to work.

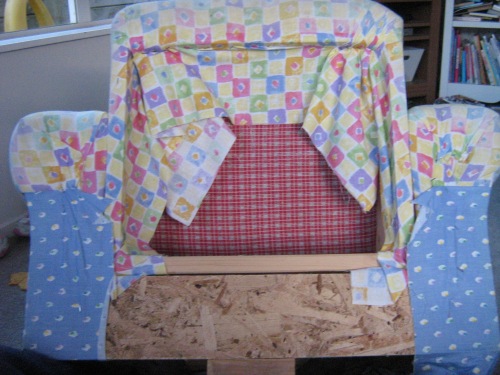
It didn’t help in the slightest that I was coming down with my daughter’s tummy bug and felt like the chair looked. In retrospect, it may not have been the best moment in time to tackle a job that I knew not what it entailed. But I hammered in the tip of the screwdriver and pried up the staples and pulled with pliers.  Eventually, I reduced the chair to this.

Ick. Gross. Gagfest. That was the moment, when I was pulling out decade-old pretzels, that I really began to wonder, WHAT THE HELL WAS I DOING?

Determined I was going to conquer this thing, I continued on. At least now I had snack food, right?

I removed the fabric ever so carefully.  I had developed a plan at this point, you see. I would use the old fabric as a pattern for the new pieces and hopefully save myself one less bottle of wine and a few clumps of hair in the process.

And I continued on, moaning and complaining, because I could. Hubs had the brilliant idea made the mistake of suggesting I just rip the fabric off. He was met with this.

After so many years of marriage, he quickly caught my drift and shut up, just like he was turned to stone by my awesome gaze.

And then he filled my wine glass.

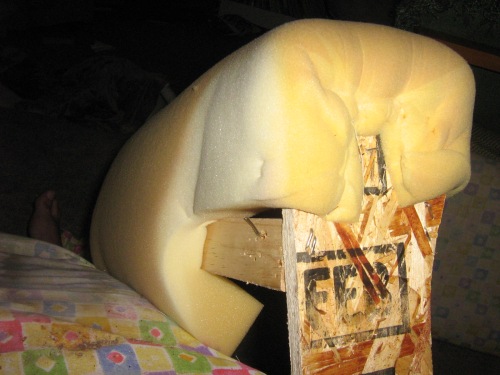
Eventually, six hours after I began, I ended up with this.

and this,

Now, don’t be deceived. There is foam there, but that pan is mostly filled with staples. By my calculations, over a thousand. And if you look at the top edge of the pan, you can see those previously mentioned godzilla-sized staples that stole at least two hours of my life and taught my children a few new words.

The following morning, I probably should have just stayed in bed. I was dealing full force with just trying to keep the flow of food in my body in its normal one way direction. But I know myself, and if I didn’t get crackin’ (I wanted to say Krakon there), that project would sit like that for six months.

So looking like death, K11 and I set out to get:

  • staples for the staple gun
  • foam for the padding
  • fabric to cover the chair

Is anything I do, EVER easy?

No.

I took the staple gun into Bunnings to get new staples. That was great, because the box of staples we had were from at least 1957. I do not joke.  So the nice man checked the staples and found the right size, and then asked, ” What length do you need? 6mm, 8mm, or 10mm?”

I pondered for a moment, and decided I needed the 10mm. I’m going to be stapling through foam and fabric right, so, I figured I needed the extra depth on the staple. Cool. Staples? Check.

Onto Spotlight, where K11 and I hummed and hoed over fabric. We both really loved this beautiful modern sea-foam teal print, but I am a practical person. Modern sea-foam green print doesn’t go with muted country tones, so we moved on.  Eventually, we found a great multi-toned cotton drill fabric and denim to match.

We were on a roll!  Staples? Check. Fabric? Check.

Foam? Foam? What’s that? Foam? Isn’t that easy to find?

On a Sunday, at the spur of the moment, the short answer would be NO!

I found poor quality, pre-cut foam cushions at Spotlight that would have kept their loft for maybe a month. And I found a nice fabric store in Lower Hutt that even had some quilting supplies, but no foam.  I ended up spending $30 at Plastic Box for a small foam mattress pad. UGH! Frustration!

Anyway, we found foam at least. Too much money, lots of petrol and three hours later, we at least had foam. Check.

At this point, I really felt like I could see the end of the tunnel, and that tunnel ended with me in my bed, tucked in all warm and cozy, just like a sickling should be. Now that I had everything, I was ready to get started.

I gathered all the necessary bits and bobs around me and went to load the staple gun.  And guess what? 10mm staples won’t fit in my staple gun!

*Steps up to the front of the insanity queue*

A wise person would have called it quits for the day, but me? No, I was not going to be defeated, flu or not. I drove straight back out to Bunnings, mumbling unmentionables the entire way and got the 8mm staples. I must have still been of sound mind at point, because I even checked this time to be sure that length would fit.

Finally, four hours after I started the hunt for elusive foam, I was ready to get to work. Thankfully, I had taken pictures all along the way so that I would end up with something close to what I started with, only cleaner, and not decorated with old drinks and stale food.

And then I discovered why there were a thousand staples. It really does make for a nicer finish on the surface. So, I plugged along, and amid nausea and sore joints, I conquered that beast.  I cut and pulled and stapled and hammered and believe it or not, I even managed to do it with less than nine hundred staples!

I don’t think I’d do stripes next time. That was yet another UGH moment.

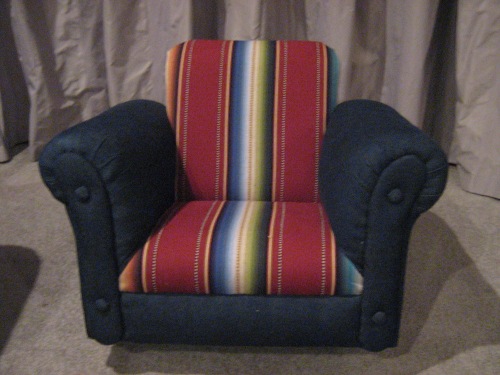
But I’m pleased.

It’s still colourful, but it matches the room now.

And we won’t discuss those four little upholstery tacks on the front and the hot glue gun. There were a few extra words uttered over those.

*Steps from queue and takes insanity and flu for warm snuggles in bed*
Anyone still reading?

It’s been a whole year since I posted. Shame on me.  So, I decided to celebrate by posting again. What better way to celebrate than with birthday cake?

The kids and I decided on a Twilight Saga cake this year and we spent hours upon hours making it together. And here it is…

We did some improvising with the pieces on top. That would be a golf ball inside of the “apple” and we used real chess pieces to help the shape of the pawn and queen. The queen was a bit temperamental, but alas, we succeeded. My quilting ruler and pizza cutter were even put to use.

The black icing was a bit difficult to do, but I started with chocolate fondant/read-made icing, and used cake dyes from there. I ran out of fondant so we improvised with some red buttercream icing for the ribbon and edgings.

The best part?  It’s red velvet cake!

I’m not so sure I’d make it again since it took TWO TABLESPOONS of red food colouring. Need I say that the kids were insane after eating this? Deja vu.

Edward joined in the fun too. He had a forking good time!

So, glad to be back! Stay tuned.

xoxo

I don’t normally make birthday cakes for myself.  It always seemed kind of silly really.  But this year, the kids are on school holidays, and well, we needed an activity.

Someone posted a link to a Omnomicon on one of the forums I’m on, about how to make a Rainbow Cake.  LOVE the look of this cake. I’m not normally into such bright colours, but this is just too cool.

So I bought some cake mix and pulled out the gel dyes.

A good blogger would have taken more pictures, but oh well.

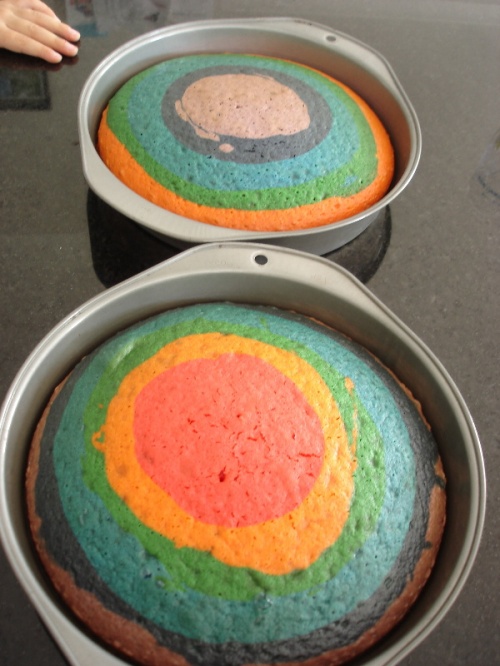
These are how the cakes looked while cooling.  I was a bit distraught at the browning of the violet colour, but it was still workable. And no, mine are the full fat, full calorie version.

rainbow-cake-cooling

I didn’t like the icing AT ALL that they used in the omnomicom cake.  Bleurgh.

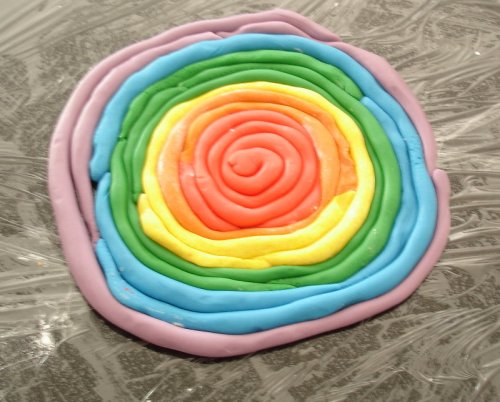
So I got out my gels again, and coloured some ready-made icing, and spiraled it together.

rainbow-cake-icing

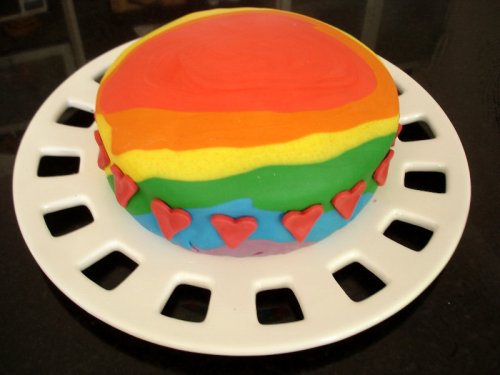
I rolled the icing out and added it to the cake.  The stuff stretched while I was putting it on the cake, so it gave it an ovalness that was not pleasing to my eye.  But c’est la vie.  Added a few hearts, and voila.

rainbow-cake

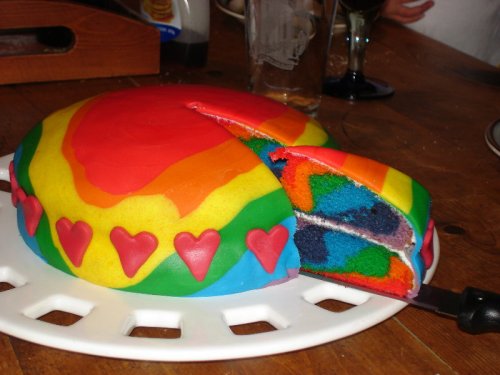
And the best part was eating it.

rainbow-cake-cut

Word to the wise though: Don’t serve it to kids after dinner.  Make it an early afternoon cake instead.  The food colouring induced mania is easier to handle in the daytime. 😉

Conversation Piece

A conversation piece is usually something that incites discussion.  It’s usually something very artful, or well, just ugly enough to make you want to dis it, breaking the silence barrier and lightening the mood of a group of people.

This is neither.

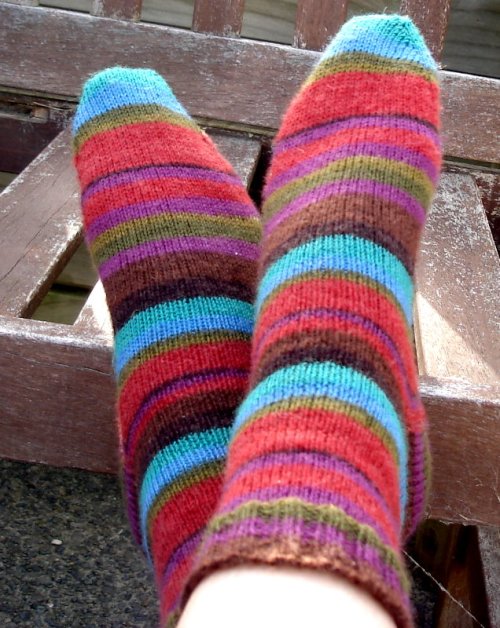
My friend Sheryl was coming to stay, and since we like to gasbag, I needed something I could knit without thinking.  No pattern, no lace, minimal counting, JUST KNITTING.

I bought some  Regia Kaffe Fassett Design Line sock wool last year because I adore stripes.  All I could find at the time were colours from the mirage range though, which are random dyed.  Took me ages to find the colour I wanted in the Landscape range.  But then the wool just sat there.  I fell in love with Vintage Purls and lace and designing my own socks, that I figured I wouldn’t even knit up that wool.  How pathetic is that!

So I decided that colourful striped socks in plain stocking stitch were just the ticket.  Simple.  Effective. Easy.

plain-jane-close

This  is literally a conversation piece.  Simple knit socks, that I knit around and around and around, while conversing the whole time! They took me all of four days.  That’s a heap of gasbagging!

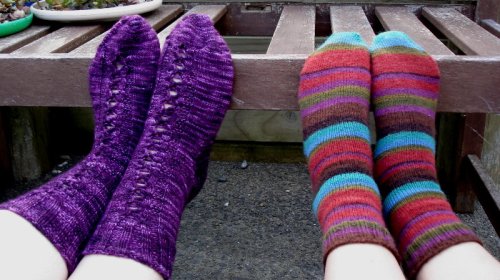
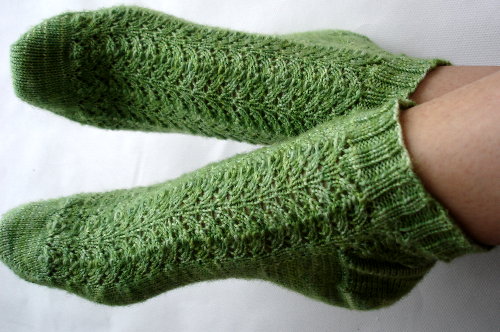
Sheryl knit a pair as well.  Her Theodora socks from the current Sock Club through Vintage Purls.  A decent friend would have taken a nice pic of the two of us together, but instead, here is a pic of our feet.

plain-jane

These are currently my most favourite socks.  I have to admit, that when I was done knitting the toe, I had decided I didn’t like the feel of the yarn.  It seemed scratchy and stiff.  But i LOVE them.  Mostly because they fit like a glove.  I’ve had some problems with how many gusset stitches to use to balance the height of the instep with the lace knitting I’ve been doing, but went with the lower end of 12 gusset stitches on these socks.  Between that and measuring the length of my foot at the end of the sole instead of the back of the heel, these are a perfect fit.  They have just the right amount of negative ease to them.

So, that’s my conversation piece.  I called them Plain Jane, because they are just knit stitches, but wow, they are anything but plain.

Cute As a Button

I have amazing friends.

Really, I do!

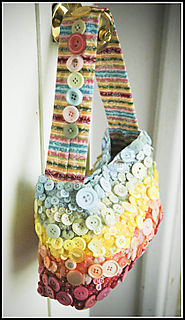
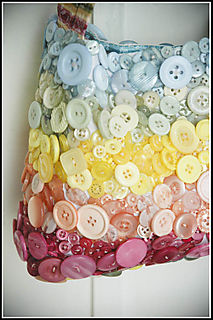
This is what my friend Jayce made for me.

cute-as-a-button

cute-as-a-button-2

cute-as-a-button-3

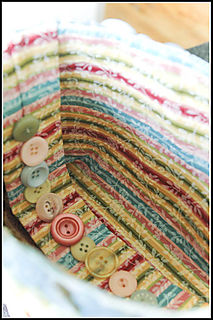
It was inspired from a trip to Te Papa, where they have an exhibit about fashion through-out the century.  In one of the displays was a button bag.  And Jayce’s idea was born.

The stats:

  • 4 months to make.  All the buttons are hand sewn on.  Yikes!  Not only that, each one has been sealed on the front and the back to keep any from coming loose.
  • 1.5 kg of buttons.  Now you understand why it took 4 months
  • Many swear words were apparently uttered during it’s making.

Jayce, thank you.  It’s just divine!

Yarn Swap V.3.0

Yes, it’s that time again.  We finish one swap and the next one starts.

I signed up for two swaps again.  I wanted to go all out, but believe it or not, I held back this time.  I was trying not to make my packages so OTT, as it’s easy for me to get carried very far away!

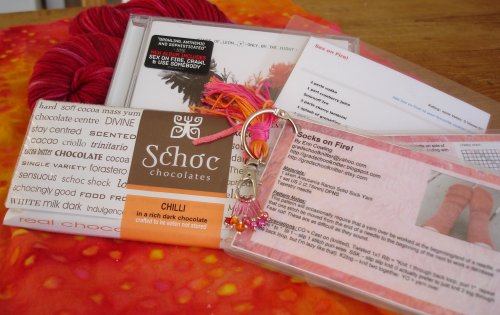
The first one I did is based on the Kings of Leon song Sex on Fire. My person mentioned lots of things she would like, but the only thing that hit me was that she currently liked listening to Kings of Leon.  That could well be because they have also caught my fancy of late.  Sex on Fire is actually my ring-tone at the moment, so I get to hear it every so often, and then get to sing it in my head on repeat for hours after that.  Much better than the In The Night Garden theme song any day.

So I got stuck into figuring out what to add.  I was thinking the theme might be a tad mature, but then I found a sock pattern called, Socks on Fire!  Oh my freaking goodness!!!  So, that cinched it for me.

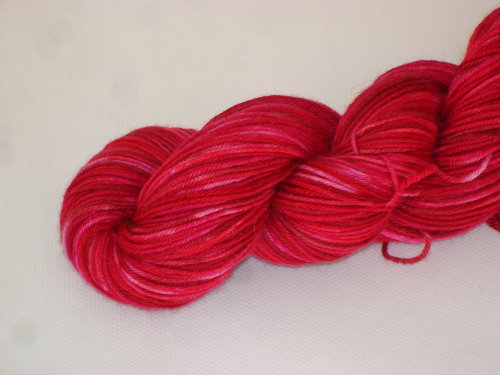
The yarn I dyed is 100g Paton’s Patonyle, originally a caramel colour.  It’s dyed with Dylon in shades of pinks and red, which are the colours that come to mind when I think of the theme.  I would have added some orange as well, but my swappee isn’t into orange, so stuck with just the shades of reds and pinks.

dyeing-sex-on-fire

For the gift, I bought a copy of the Kings of Leon’s Only by the Night album, and made little sock stitch markers on a “Fire” fob.

yarn-swap-v3-sof

The “piece of paperwork” for the swap was the drink recipe which is actually called Sex on Fire!

It was all just meant to be!

And to top it off, because I am a dork  and only dyed 100g of wool, instead of the 150g minimum, I added in a Schoc Chocolate bar in Chili Flavour.  I had a taste sample at the Schoc store, and it is sure to spice up any one’s life.

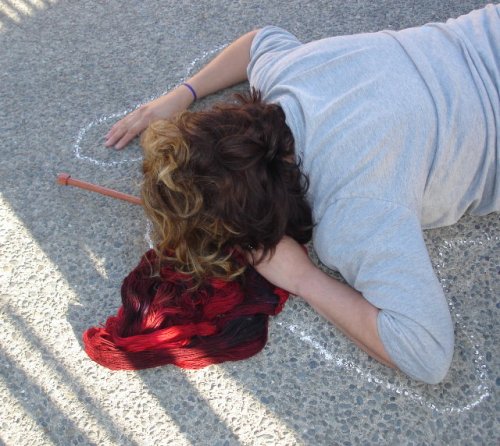
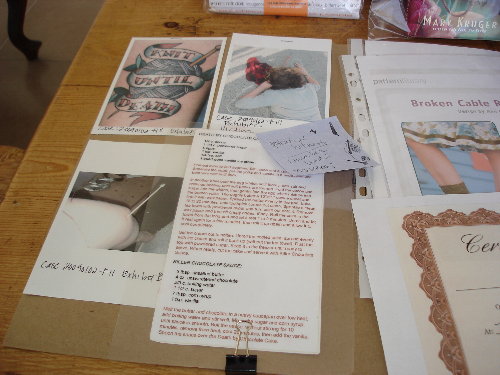
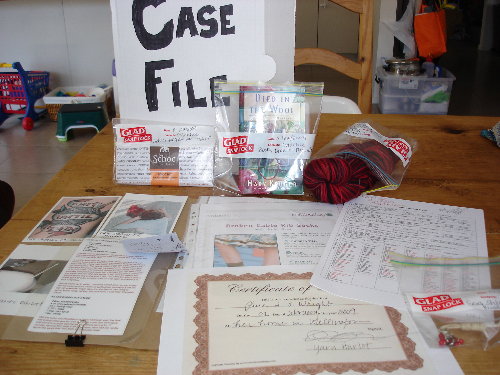
The next one has to be some of the best, yet morbid fun I’ve had in a long time.  My swapper said in her notes that she likes a good blood splatter thriller book.  In particular, she was into the Scarletta series by Patricia Cornwell.  A bit of googling, and I came up with “Death By Knitting.”

I had a crime scene. (100g patonyle dyed in deeps reds and black.)

tnn-yarn-swap-pm1

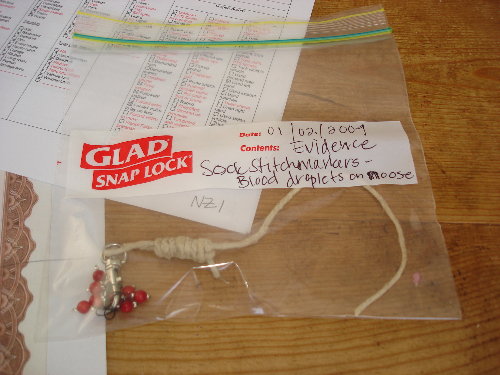
Blood splatter disguised as sock stitch markers on a noose.

yarn-swap-v3-dbk-blood-drops

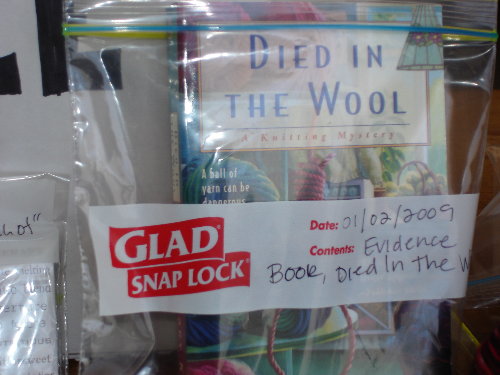
A manual on murder disguised as literature, Died In the Wool, by Mary Kruger, bagged and tagged as evidence.

ys3-book

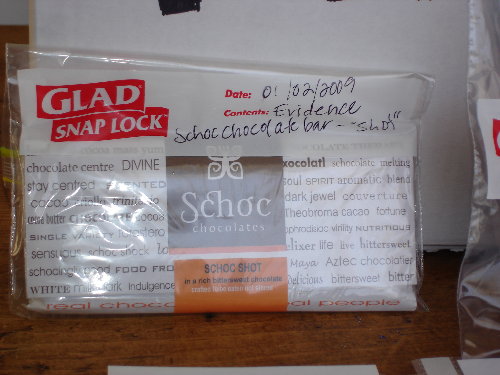
The motive!  Who wouldn’t kill for some Schoc Chocolate!

ys3-shot

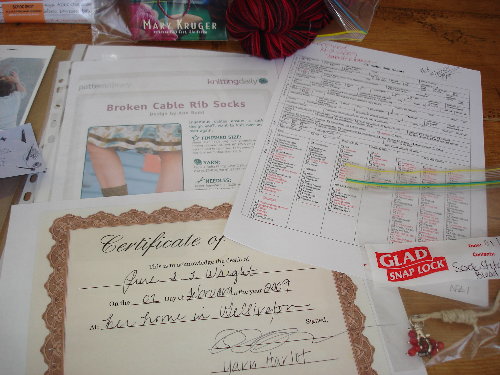
Informant information on Broken Cables, along with some other pieces of information like a police report and death certificate.

yarn-swap-v3-dbk-case-file-2

More crime scene pictures (gotta love Google), plus a recipe for Death By Chocolate.

yarn-swap-v3-dbk-case-file

And all of it, packed away in a Case File.

yarn-swap-v3-dbk

That was so much fun!

I received two in return.  The first one came before the deadline and got me in a panic.  But what a lovely parcel, all tied up in string.

The first was was titled *Strawberries.*  YUM!
yarn-swap-v3-strawberries-entire

It was 200g of Merino et Soie, dyed with Ashfords Hot Pink and Scarlet coloured acid dyes. (My swapper even had an extra 300g that I bought off her as I LOVE this colour.)  She sent a strawberry coffee cup (yes, I love my cup of joe!), and a strawberry huller which is a kitchen gadget I didn’t have. Perfecto!  The recipe is for Pam’s Scarlet Strawberry Cordial which is a family recipe.  And the pattern picked is Strawberry Hill by Melissa Matthay.

Because I had so much extra wool, I knit this up as well, which I blogged about here.

spring-butterfly-3

But wait!  There is one more!!!!

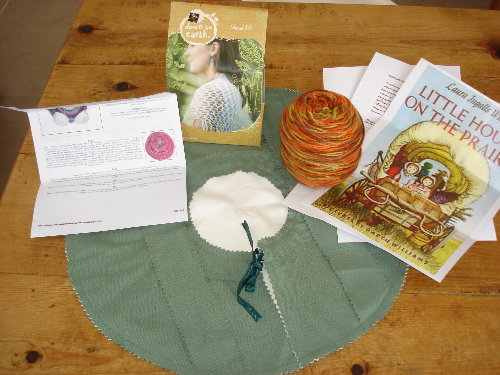
This one is based on Little House on the Prairie.  My yarn fairy wrote up this little story to go with the swap.

It is a Saturday morning in out “Little House on the Prairie” in the height of summer. Pa is out in the fields milling the timber and I have just finished gathering up the vegetables and fruit out of the garden.  I take my basket into the kitchen and there is Ma at our kitchen table wearing her apron.  I can smell the bread baking in the oven and Ma has the preserving pot all ready and waiting.  I place the basket on the table and begin helping to peel the fruit. Every summer about this time, Ma does the preserves and places them in the pantry that Pa built. You should see it.  There is orange marmalade, cucumber relish, and bottles of pickled onions.  Ma said that after we finished the preserving, we are going across the way to visit the Price family, so I had better go and fetch the cake carrier and Ma’s shawl before Pa arrives with the horse and carriage. Clip, clop, here comes the horses, have to go now.

yarn-swap-lhotp-whole-packageIt contains:

  • The wool is dyed to reflect the colours of Ma’s preserves in the pantry.
  • An apron just like Ma’s as a said it is a mothers second skin.
  • A cake carrier for when I go visiting.
  • A pattern for a knitted piggy.
  • A package of 150g bamboo for a shawl.
  • Recipe for a Banana and Date tea loaf.

Whoa Nelly would be an appropriate exclamation for this one!

The apron is currently being used for my clothes pegs.

yarn-swap-lhotp-apron

And a closer pic of the yarn.

yarn-swap-lhotp-yarn

Since I decided to not use the Malabrigo for boy’s pants for winter, I might well use this.  It goes with several of his shirts and is just lovely colours for a boy.

Thank you Joanne and Pipi!  I love the swaps you’ve put together.

So, what’s the next swap on the list?  The Magic Yarn Ball Swap!!  But you’ll just have to wait and wonder a bit for that one. 😉

Baby Socks? Sock Yarn Afghan? Shawl of mixed yarns?

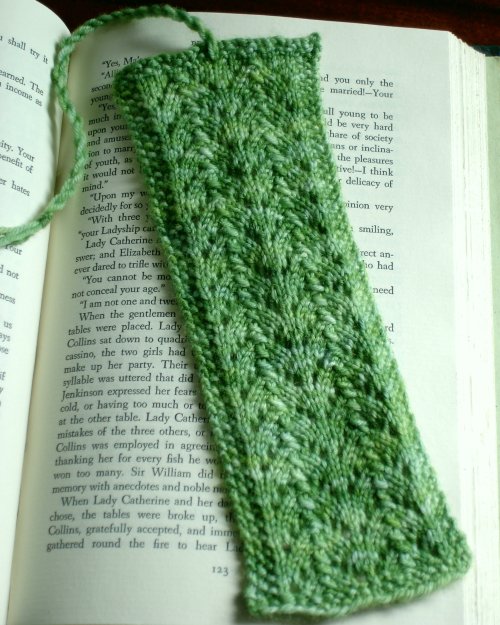
What about a bookmark. 😉

tell-me-a-tail

This is to compliment the Mermaidia socks I blogged about in this post.

I still have heaps of this sock yarn left, so might have to do a small pair of socks afterall.

Tell Me a Tail

Gauge is not important on this, but the smaller the better.  I used leftover 4ply/fingering weight yarn, which is about the thickest yarn I would use for a bookmark.

Materials:

2.5mm needles

8g 4 ply/fingering weight yarn (approx. 35 yards)

Wool needle for adding  the tail.

Abbreviations:

K = knit one stitch

P = Purl one stitch

yf = yarn forward (bring the yarn to the front as if to purl).  Also known as a yarn over.

sl1 = Slip one stitch purlwise from the left to the right needle.

k2tog = knit two stitches together

psso = Pass slipped stitched over

P2tog = Purl two stitches together

Instructions:

Using Long Tail Cast On, cast on 23 stitches.

Border:

Knit three rows border rows as such:  *K1, P1*, repeating ** to last stitch, K1

Start the pattern:

Row 1: k1, p1, k2, *yf, k2, sl1-k2tog-psso, k2, yf, k1* repeating ** once, k1, p1, k1

Row 2: k1, p1, k1, p17, k1, p1, k1

Row 3: k1, p1, k3, *yf, k1, sl1-k2tog-psso, k1, yf, k3* repeating ** once, p1, k1

Row 4:  Repeat row 2

Row 5: k1, p1, k4, yf, sl1-k2tog-psso, yf, k5, yf, sl1-k2tog-psso, yf, k4, p1, k1

Row 6:  Repeat row 2

Repeat rows 1 – 6, fourteen more times.

Knit two border rows as such:  *K1, P1*, repeating ** to last stitch, K1

Knit third border: [K1, P1] x 5, K1, yo, P2tog, [K1, P1] x 5

Cast off loosely on a needle two sizes larger OR

*Cast off 5, cast on one using backward loop and immediately cast off 1* repeating to end.

For the twisted cord tail, take a piece of yarn approx. 40inch long.  Thread it onto a needle and pull through the yo opening on the last border row so that the bookmark is centered on the doubled yarn.   Twist the yarn tightly, and then allow the two yarn sides to twist into each other.  Tie a knot at the end and trim the ends.

Block and enjoy. 😀

For Hope

Some sad news has hit one of the forums of which I am a member.  A member’s  two year old daughter has been diagnosed with neuroblastoma. Cancer is a horrible thing for anyone to deal with, but particularly hard when the one affected is a child.

In a show of support, several of the TNNers are making a blanket for Hope, with each person knitting up a 20cm x 20cm square to be sewn together into a large knitted quilt.

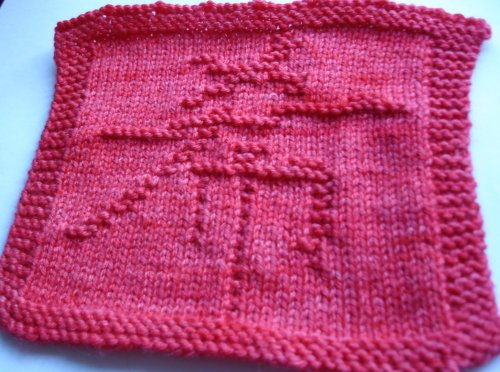
So I’ve made up a pattern in the image of the Chinese character for “Hope.” My square contribution is knit to this pattern, in Merino et Soie 8ply DK on 4.5 mm.

hope

I would like to ask that anyone in New Zealand who uses this pattern (dishcloth or otherwise), to please make a donation of any domination to Hope’s fund through Kiwibank.  At the very least, give your child(ren) a hug and kiss and tell them you love them.

The fund account number is:

Hope Osborne

38-9009-0002097-00

For those wanting to follow Hope’s journey back to health, her father has set up a Facebook Group.

All my thoughts and get well wishes are with Hope and her family.


Hope

Pattern Info:

Gauge: 6 sts x 8 rows per inch

Yarn: 8ply DK Yarn of your choice, preferably cotton or bamboo if for a dishcloth.

Needles: 4.5mm

Gauges is not important if you are knitting this as a dishcloth.

Pattern:

CO42 using Long Tail Cast On

Rows 1 – 5, and all odd rows: Knit

Rows 6, 8, 10, 12:  K4  P18  K1  P15  K4

Row: 14:  K4  P18  K1  P5  K1  P9  K4

Row 16:  K4  P2  K3  P9  K1  P3  K1  P4  K2  P9  K4

Row 18:  K4  P4  K2  P8  K1  P3  K1  P3  K1  P1  K2  P8  K4

Row 20:  K4  P6  K2  P6  K1  P3  K1  P5  K2  P8  K4

Row 22:  K4  P7  K2  P5  K1  P3  K1  P5  K2  P8  K4

Row 24:  K4  P9  K2  P3  K1  P3  K1  P5  K2  P8  K4

Row 26:  K4  P10  K2  P1  K13  P8  K4

Row 28:  K4  P11  K2  P4  K2  P3  K3  P9  K4

Row 30:  K4  P12  K2  P3  K3  P14  K4

Row 32:  K4  P3  K9  P1  K2  P19  K4

Row 34:  K4  P10  K11  P13  K4

Row 36: K4  P14  K2  P4  K12  P2  K4

Row 38:  K4  P11  K2  P14  K3  P4  K4

Row 40:  K4  P13  K3  P5  K2  P11  K4

Row 42:  K4  P15  K3  P1  K4  P11  K4

Row 44:  K4  P13  K7  P14  K4

Row 46:  K4  P11  K3  P4  K3  P13  K4

Row 48:  K4  P19  K3  P12  K4

Row 50:  K4  P19  K2  P13  K4

Rows 51 – 55:  Knit

Cast off Knitwise.

If you want a stretchier cast off, cast off as follows:

*Cast off 5, cast on one using backward loop and immediately cast off one* repeating ** to end.

More Test Knitting

Well, I’ve been working up a couple patterns myself that people have been requesting, but in between times, I’ve done a couple of test knits for friends.

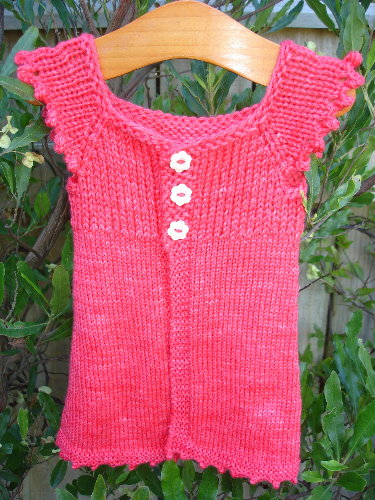
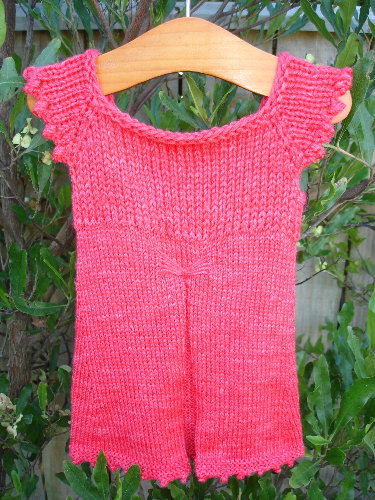
You might remember the Kaia Babydoll pattern I tested for my friend Rachel?  Well, she’s got another pattern she’s just released called Spring Butterfly (free Ravelry Download), which is a top-down raglan cardy in size one.  She’s used a picot cast off on the sleeves to add a different touch, plus a slip-stitch butterfly motif on the back that tops a cute little reverse stocking stitch pleat.

This is the one I knit up.  I used some of my yarn from the last yarn swap I’ve received (yet to be blogged, BAD BLOGGER!), which is hand dyed Merino et Soie.

spring-butterfly-3

I changed the bottom hem from the pattern, which calls for a knitted frill.  I wanted the bottom to have the picot as well.  Here are the mods I did:

  • 13 increase repeats from the bottom of the  butterfly.
  • Six rows of the following:  knit to second marker, purl to next marker, knit to end.
  • Cast off in picot with Cast On 2, cast off 6.

A couple more pics, one of the back and one more close up of the butterfly.

spring-butterfly-2

spring-butterfly-1

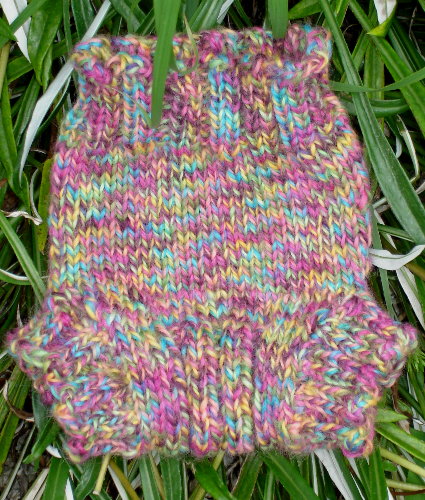
The other test knit was a 12ply version of the Vanilla Soaker (a low cost Ravelry download), by Kelly of Incidental Happiness.  She’s just released her 8ply pattern for sale, and is furiously working on the 10ply and 12 ply versions to be included as well.

This is a GREAT soaker pattern, knit in the round, which uses a provisional cast on to knit the crotch flat first, so that there is no grafting of the soaker.  The ribbing is a nice features, allowing for stretch in the crotch to ease in the sizing.

I used some Yarn Bee Wool #070 in the Rainbow Twist colour and knit the newborn size.

vanilla-soaker-test-nb-12-ply-close

The only mod I did on this was the cast on.  I used a Tunisian Cast on, and left one side of the stitches on a spare circular needle.

So, now I need to finish doing some more blogging, because one again I am way behind.

OMG I dyed the Malabrigo

Talk about pucker factor.

Malabrigo is not something I want to mess up.

I was trying to replicate this wool, which I kettle dyed for my last yarn swap.

tnn-yarn-swap-v2-potc-wool

This is what I got.

dyeing-malabrigo

Not as bluey, but I am still pleased with it.

Now for the shocking part.  It’s for pants for the boy for winter.

Deranged, I know.  Maybe someone needs to talk me out of it. 😉

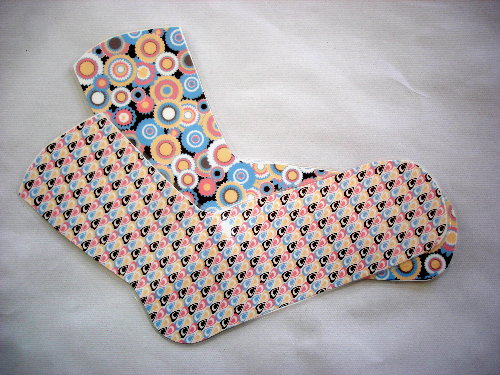
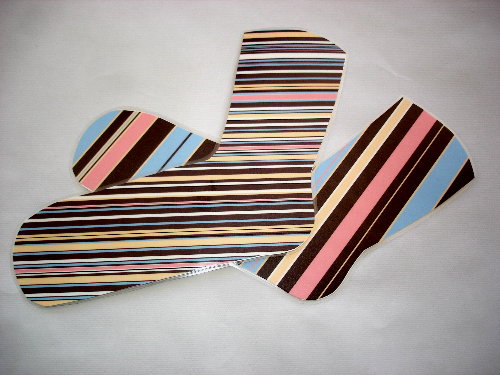
When you knit socks, you suddenly have a need for sock blockers, but I needed some r.i.g.h.t n.o.w.  And I didn’t want to pay out a chunk of change to get just one size either.

Found this simple tutorial on ravelry for DIY sock blockers, which uses placemats, cut to the necessary shape or size you need. I was worried that if you cut the placemat, any laminated paper on the inside would get damp while blocking your socks. Plus, I didn’t want to buy nice placemats, just to chop them up.

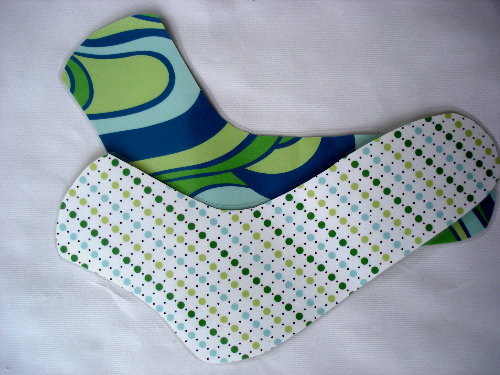
So I modified, and used what I had, and got a variety of styles and colours and sizes that I never could have gotten with just a placemat.

I dug out some much neglected scrapbooking paper, cut it to the size I needed, laminated and trimmed. And Voila!!!

These in a size 10.

sock-blockers-blue-green

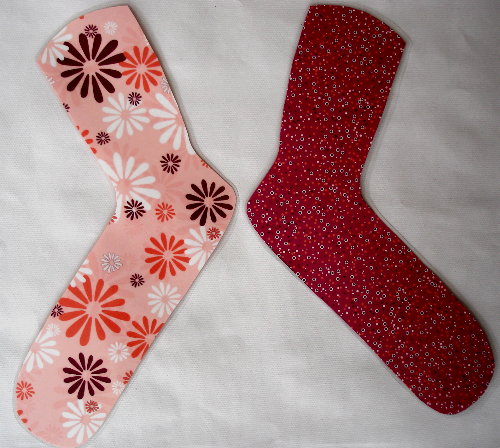
And these in size 9 (double sided paper).

sock-blockers-reds

And double sided with four different, coordinating  papers.

sock-blockers-blue-and-pink-front

sock-blockers-blue-and-pink-back

Not perfect, but functional, and practical.

sock-blockers-in-use

What does Gordon say?  DONE!

Mermaidia

So, I mentioned I learned Magic Loop and Toe Up Socks in this post. I love knitting socks, but ever since knitting my Wicked I’ve found I enjoy being able to try things on as I am knitting them.  You are able to get a much better fit. Plus if you have to frog back, it’s easier to do that while in the middle of knitting it,  than it is having a finished garment that just doesn’t fit properly.

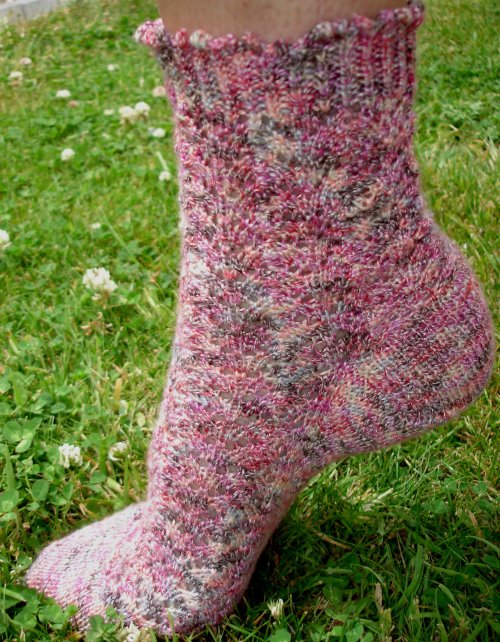
Anyway, I took the bulls by the horn, and cast on for some socks, but wanted something a bit fancier than just plain stocking stitch, so I frogged it and started over.  I took my favourite dishcloth pattern, and turned it into a sock pattern.

mermaidia-sock

mermaidia-sock-21

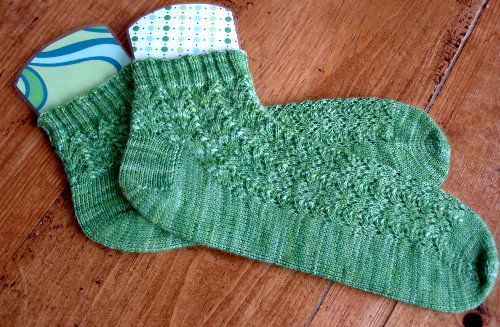
I was so determined to use my Regia Bamboo Colours, but it’s a little hard to see the lacework.  So I knit up some Vintage Purl Sock Wool in Chlorophyll.  These are a gift.  A very belated Christmas present, but better late than never.  The semi-solid dyeing shows the pattern in much more details.

sock-mermaidia-chlorophyll

I had to modify a bit as the wool knit tighter than the Bamboo did.  Plus, I did an anklet height, so only did four lace pattern repeats after the heel flap, and a plain cast off.  I called the pattern Mermaidia based on both origin of the stitch pattern and because it looked like a gathering place for Mermaids.

And one a little closer, showing the lacework.

sock-mermaidia-chlorophyll-close

The lighting, plus my novice photo editing skills don’t do the colour justice.

So, here is the pattern.  It will be uploaded to Ravelry as well. Special thanks to the lovely Morag of Vintage Purls, for helping me get my head around doing the heel flap in reverse.

This sock when knit in gauge, should give you a US Woman’s shoe size of 8 – 9.  It can be easily lengthened or shortened by adding rows in the foot.  It is designed to use Magic loop. It can be done on DPNs if you wish, just be careful with the pattern, as there are more stitches on the top of the sock than there are on the bottom.

Gauge:

9 st x 12 rows per inch in stocking stitch

Materials needed:

100g 4ply Regia Bamboo Colour

2.50mm 80cm circular needle (I used Knit Picks)

3 place markers/stitch markers.

Abbreviations:

k = knit

p = purl

sl = slip purlwise while keeping yarn at the back

kfb = knit into front of loop and then into back of loop

yf = bring yarn to the front of the work as if to purl

psso = pass slipped stitch over

m1 = This is the M1L from knittinghelp.com: Using the left needle, lift the purl bar between the stitches on your needles and knit into the back of the loop

k2tog = knit two together

p2tog = purl two together

pm = place marker

rm = remove marker

slm = slip marker from left to right needle

BarInc = : Using the left needle, lift the purl bar between the stitches on your needles to create a new stitch.

Cast on toe:

Using Judy Becker’s Magic Cast-On or Turkish Cast On, cast on 24 stitches (12 on each needle) and knit one round.  Place marker (or pull tail yarn to the outside of the work) to mark the beginning of the round.

Toe Increases:

Round 1: Kfb, knit to next to last stitch on needle one, kfb, k1.  Repeat on needle two.

Round 2: Knit.

Repeat rounds 1 and 2 nine times for a total of 10 sets of increases.  You should have 32 stitches on each needle.

Round 1: Knit 16, M1, K to end of round.

Round 2: Knit

You should now have 33 stitches on needle one, and 32 on needle two.  The extra stitch on needle one is to center the lace pattern.

Start the lace pattern here for needle one only.  Knit all stitches on needle two. Work 9 pattern repeats, or until sock is 3.5 inches less than the length of your foot from toe to heel.

Lace pattern:

Row 1: k1,*yf, k2 , sl1-k2tog-psso, k2, yf, k1* (x4), knit to end of round

Row 2: k

Row 3:k2,*yf, k1, sl1-k2tog-psso, k1, yf, k3* (x3), yf, k1, sl1-k2tog-psso, k1, yf, k2, knit to end of round.

Row 4: k

Row 5: k3, *yf, sl1-k2tog-psso, yf, k5*(x3), yf, sl1-k2tog-psso, yf, k3, knit to end of round.

Row 6: k

Gusset Increases:

I will now interchangeably refer to needle one as the instep and needle two as the insole. Continuing the lace pattern on needle 1 (instep), work gusset increases on needle two (insole) only.

Round 1: k1, pm, m1, k30, m1, pm, k1

Round 2: knit

Round 3: k1, m1, slm, k32, slm, m1, k1

Round 4: knit

Round 5: k1, m1, knit to marker, slm, k32, slm, knit to last stitch, m1, k1

Round 6, knit

Work rounds 5 and 6 a total of 10 times, ending in a knit row.  You should now have 12 gusset stitches on either side of your place markers, and the 32 insole stitches between the place markers.

Reverse Heel Flap:

Knit in pattern across the instep (needle one).  You will now be working back & forth on the insole needle only (needle two).  Do not wrap your stitches when you turn.

Row 1: k12, slm, k32, turn

Row 2: sl1, p31, turn

Row 3: sl1, k30, turn

Row 4: sl1, p29, turn

Row 5: sl1, k28, turn

Row 6: sl1, p27, turn

Row 7: sl1, k26, turn

Row 8: sl1, p25, turn

Row 9: sl1, k24, turn

Row 10: sl1, p23, turn

Row 11: sl1, k22, turn

Row 12: sl1, p21, turn

Row 13: sl1, k20, turn

Row 14: sl1, p19, turn

Row 15: sl1, k18, turn

Row 16: sl1, p17, turn

Row 17: sl1, k16, DO NOT TURN. You will now knit in the 8 abandoned short row stitches that are on your left needle as follows: *BarInc, k2tog* (x8). You will now pick up the first gusset stitch as such: rm, sl1 to right needle, pm back on left needle, pass next to last stitch on right needle over the slipped stitch, turn.

Row 18: sl1, p23, *BarInc, p2tog* (x8), rm, sl1 to right needle, pm back on left needle, pass next to last stitch on right needle over the slipped stitch, turn.

Row 19: sl1, k31, rm, sl1 to right needle, pm back on left needle, pass next to last stitch on right needle over the slipped stitch, turn.

Row 20: sl1, p31, rm, sl1 to right needle, pm back on left needle, pass next to last stitch on right needle over the slipped stitch, turn.

Repeat rows 19 and 20 ten more times, until all the gusset stitches have been knit in, ending in a purl row, turn.

You will start the lace pattern now on needle two (which is now the back of the leg). For this row only, knit lace pattern on needle 2 as follows:

yf, sl1, k1, sl1-k2tog-psso, k2, yf, k1, yf, k2, sl1-k2tog-psso, k2, yf, k2tog, yf, k2, sl1-k2tog-psso, k2, yf, k1, yf, k2, sl1-k2tog-psso, k1, sl1, yf.   You will now have 31 stitches on needle two for the remainder of the sock, instead of 32.  You should now be back at the beginning of the round, ready to work round 2 of the lace pattern.  Work round 2 in the following fashion ONCE, and then continue in original lace pattern, working lace on both needles one and two.

Round 2 (do only this one time): sl1, k31, sl1, knit to end of round. Be sure not to accidently knit your yf and your sl together at the beginning and end of needle two.

TIP: Because there are yf increases at the beginning and end of needle two in round 1 of the lace pattern, it is very important to keep these as tight as possible, so as not to create ladders in your work from the areas between needles.

Continue in pattern, for 10 pattern repeats, or to desired length.

Cuff:

Work 10 rows in twisted rib: (k1tbl, p1) x 32

OR work an alternate cuff of 12 rounds of 2×2 rib, followed by a normal cast off.

Cast off:

Picot cast off (or use your preferred cast off method). *Cast on 2 stitches using cable cast on, cast off 4 stitches in the usual manner. Move last stitch you knit from the right needle to the left needle, and repeat from *.

Please note, this pattern is free for personal use.  Not commercial use of this pattern without prior approval.  Copyright 2009 Christine Jeffery

PDF download is here:

Mermaidia Sock Pattern

Berry Quick Book Bag

Well, I got KT5 off to her first day of school on Wednesday.  Gosh it’s hard believing that she is old enough for school already.  But her raw enthusiasm for being there added some much needed excitement to the mix.

So, we got to her class, with a big bag of supplies in tow.  She has so many different work books that it took a little while to get them all put in the proper sorted baskets, along with all the pencils, glue, tissues, hats, etc.  And then I got to her reading log, which I didn’t see a basket for, so I gave it to her teacher, who then asked, “Does KT5 have a book bag?”

DAMN!  Guess what I forgot.

I had planned to make one, but just completely forgot about it during the massive duraseal-a-thon that was 23 books and a few hours in length.

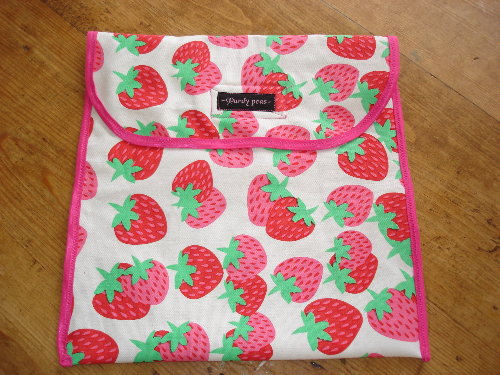
So on Thursday, one little boy decided to have an easy nap, so I whisked into the craft room, grabbed some canvas and Poly PUL, along with some FOE and made this.

book-bag

No digging the box to find her bag, I tell ya!  It stands out!

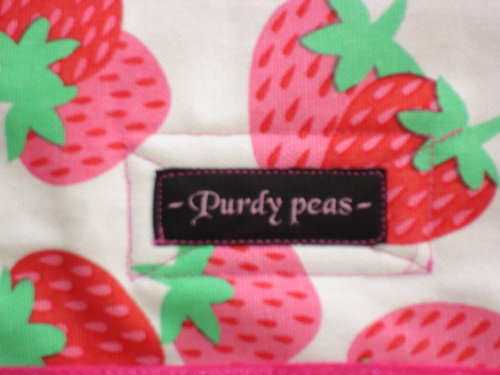
And the best part?  The label!  My lovely friend Beck of Ecobubs, Crunchy Crafter and Rebecca Gunn Designs, surprised me with these a couple weeks ago.  Sorry for the pic, but my camera really is on its last leg!

book-bag-label

Isn’t it pretty!  Thanks Beck.

And welcome to school KT-FIVE YEARS OLD!!!

Yarn Porn

I gate crashed a knitters weekend a couple of  weekends ago with some friends from around the lower North Island.  It was put together by the amazing James from Joy of Yarn in Greytown and featured the most awesome Morag of Vintage Purls.  It was a great workshop, teaching toe up socks using Magic Loop.

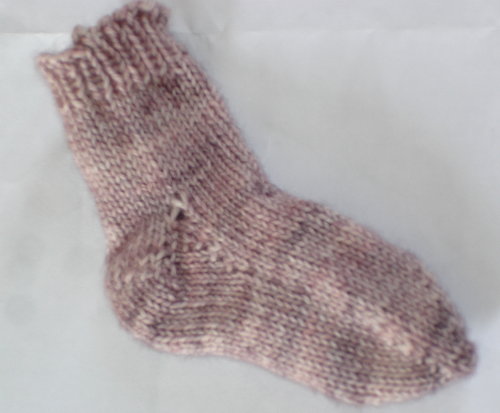
Here is my little workshop sock.

sock-workshop-sock

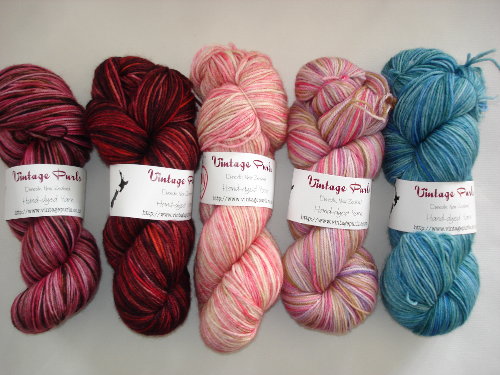
And this is what snuck in my bag for the trip home.  From Left to Right, Rosewood, Diva, Joy, Dolly and Bluhu.  All are Limited Editions ones except Joy, which Morag makes just for James’ store.

vp

I came home with some Regia Bamboo as well, and started these.

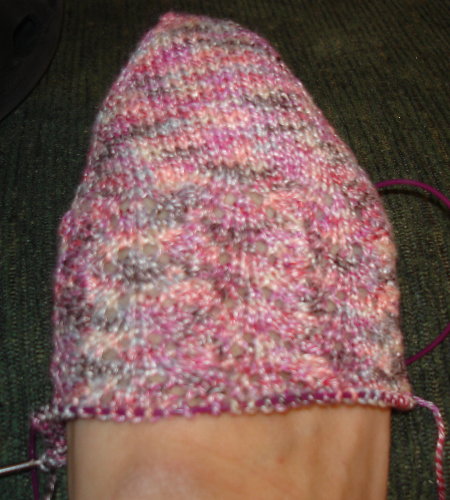
socks-toe-up-bamboo-mermaidia

I wrote up the pattern, but have a few friends checking it over, so will post it soon.

In the mean time, here is more yarn porn.

This one is Patonyle, kettle dyed in pinks and reds.

dyeing-sex-on-fire

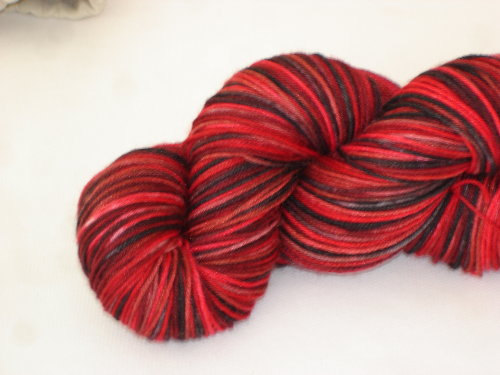
Patonyle again, in reds and blacks.  Both of these are supposed to be secrets, but will reserve the rest of the items associtated with these for another post.

dyeing-postmortem

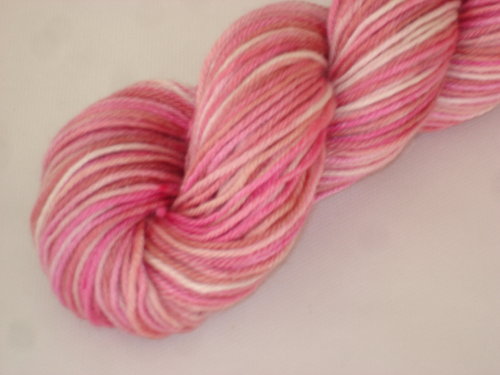
This one is an 8ply, called Mia from Knitworld.  Dyed with procion in Burgundy, Fuchsia, Magenta and Bubblegum.  Love how this one turned out!

dyeing-pink-mia

These ones are various cotton and bamboo mixtures.  A bit of random dyeing going on, if you can’t tell from the top one, which is what happens when kettle-dyeing goes VERY wrong.

dyeing-cotton-and-bamboo

Anyway, it’s always good to find out what works and what doesn’t.

Well, once again, I am a bit behind.  I wouldn’t be me if I weren’t late with everything.

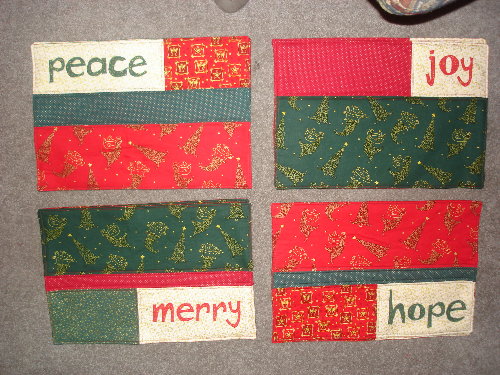
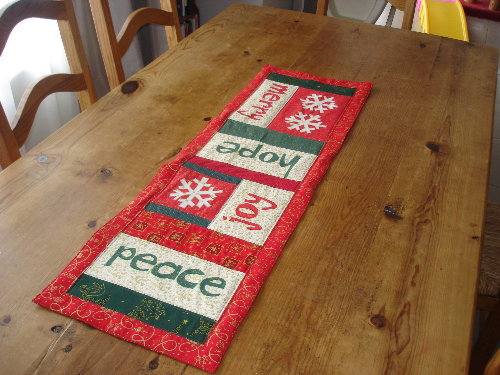
These are the placemats and matching table runners I made my folks and DH’s Mum.  It’s a pattern out of New Noel.  This would be the first time I’ve done applique. And I have to say, that I do NOT like qpplique.  At least not on small, thin letters.

I wanted them to be traditional reds and greens since they were for parents.  The quilter in me didn’t talk loud enough, so the idiot in me did stitch and turn for the edges.  Wrong-o.  The quilter should have spoken louder.  Next time maybe.

Anyway, here they are.  The placemats, a set of four.

sewing-placemats

The matching tablerunner.  I think this is much more effective than the placemats, though if I did it again, I would do the borders in green instead of red.  Live and learn.

sewing-tablerunner

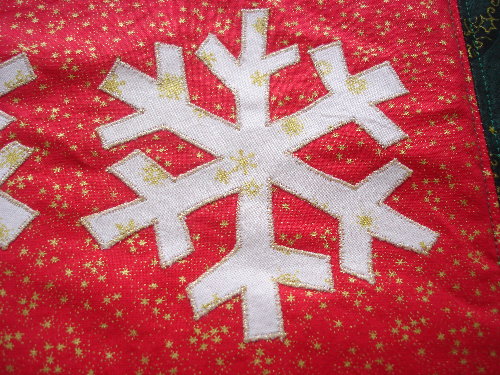
A closer picture of the snowflakes.  This is where I lost the hair on both sides of my head.  Metallic thread is so beautiful, but it SUCKS to work with.  The snowflakes alone look me h.o.u.r.s!!!!!

sewing-tablerunner-snowflake-close

And here is where I admit that I can still admire these from where I am sitting.  That is correct, I am not done with my Christmas crafting yet, so here they still sit.  At least they will be there in time for next Christmas!!