Feeds:
Posts
Comments

Posts Tagged ‘Sewing’

Berry Quick Book Bag

Well, I got KT5 off to her first day of school on Wednesday.  Gosh it’s hard believing that she is old enough for school already.  But her raw enthusiasm for being there added some much needed excitement to the mix.

So, we got to her class, with a big bag of supplies in tow.  She has so many different work books that it took a little while to get them all put in the proper sorted baskets, along with all the pencils, glue, tissues, hats, etc.  And then I got to her reading log, which I didn’t see a basket for, so I gave it to her teacher, who then asked, “Does KT5 have a book bag?”

DAMN!  Guess what I forgot.

I had planned to make one, but just completely forgot about it during the massive duraseal-a-thon that was 23 books and a few hours in length.

So on Thursday, one little boy decided to have an easy nap, so I whisked into the craft room, grabbed some canvas and Poly PUL, along with some FOE and made this.
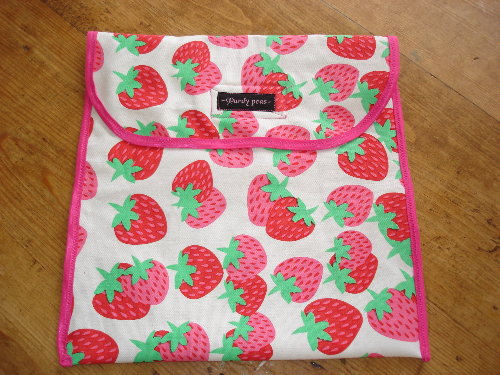
book-bag

No digging the box to find her bag, I tell ya!  It stands out!

And the best part?  The label!  My lovely friend Beck of Ecobubs, Crunchy Crafter and Rebecca Gunn Designs, surprised me with these a couple weeks ago.  Sorry for the pic, but my camera really is on its last leg!
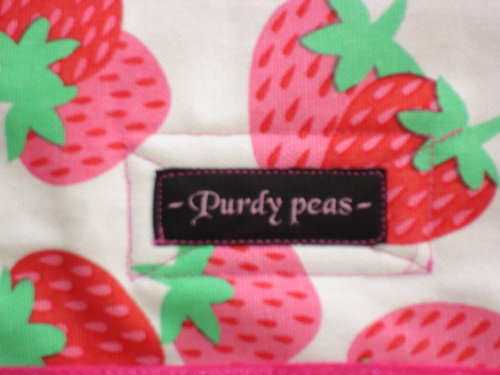
book-bag-label

Isn’t it pretty!  Thanks Beck.

And welcome to school KT-FIVE YEARS OLD!!!
Read Full Post »

Well, once again, I am a bit behind.  I wouldn’t be me if I weren’t late with everything.

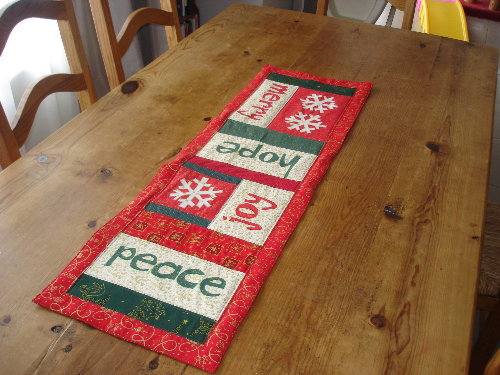
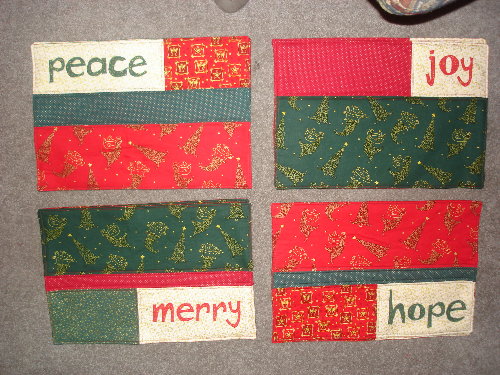
These are the placemats and matching table runners I made my folks and DH’s Mum.  It’s a pattern out of New Noel.  This would be the first time I’ve done applique. And I have to say, that I do NOT like qpplique.  At least not on small, thin letters.

I wanted them to be traditional reds and greens since they were for parents.  The quilter in me didn’t talk loud enough, so the idiot in me did stitch and turn for the edges.  Wrong-o.  The quilter should have spoken louder.  Next time maybe.

Anyway, here they are.  The placemats, a set of four.

sewing-placemats

The matching tablerunner.  I think this is much more effective than the placemats, though if I did it again, I would do the borders in green instead of red.  Live and learn.

sewing-tablerunner

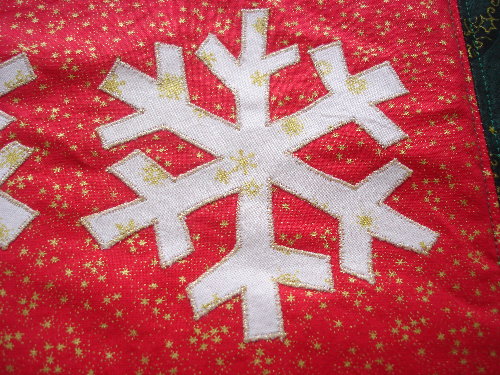
A closer picture of the snowflakes.  This is where I lost the hair on both sides of my head.  Metallic thread is so beautiful, but it SUCKS to work with.  The snowflakes alone look me h.o.u.r.s!!!!!

sewing-tablerunner-snowflake-close

And here is where I admit that I can still admire these from where I am sitting.  That is correct, I am not done with my Christmas crafting yet, so here they still sit.  At least they will be there in time for next Christmas!!

Read Full Post »

N.O.E.L.

I decided that the kids needed Christmas outfits this year.  Don’t ask me why. Well, actually, I know why.  My to-do list is almost the same length as Santa’s list, and it was a fun distraction.  That’s why.

I bought this book a few months ago called New Noel, and made the table runners and place mats (that’s for another post). But it also gave me another idea.

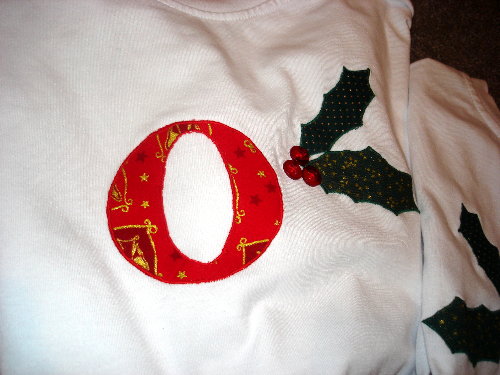
So I made a trip down to the local T and T kids store and bought some white T-shirts. Then I used the letters from the New Noel pattern book, and some hand drawn holly leaves, and appliqued them to the shirts.  I added red buttons as the holly berries too, and this is what I ended up with.

sewing-noel-shirts

The *n* shirt had to have an extra holly leaf, because I am a knob, and snipped the shirt while snipping a thread.  Applique is a life saver at times.

Here is a closer pic of the *O*

sewing-noel-shirts-close

I had originally planned on doing skirts for the girls to match, but some patterns that I ordered through a friend arrived.  They are some of the Sandi Henderson Portobello Pixie patterns and they are TOO CUTE.  So I picked the easiest pants pattern, and made ruffle capris for the girls. (Please excuse the raggamuffin look)

sewing-noe

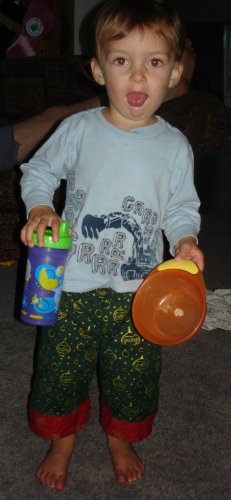
Don’t worry.  The boy didn’t get ruffle pants.  But he did get matching boardies 😉

sewing-xmas-pants-front

sewing-xmas-pants-back

So, all together, this is what they looked like.  Don’t you just love their smiles.

sewing-noel

And this is a pic of the kiddos on Christmas Eve.  Yes, we braved the shopping mall on Christmas Eve, as a special birthday treat.  This was the best Santa ever, as he sang Miss KT5 Happy Birthday.  How cool is that?!?!?!

santa_and_kids_cropped_small

Read Full Post »

The Ugly Fabric Swap

A few friends and I got together for an Ugly Fabric Swap.  We each were assigned a person that we had to send at least one meter of what we considered an ugly fabric.  Then, we had 6 weeks to create something made mostly from the ugly fabric that we received.

So I received a striped flannelette fabric.  I love stripes.  I have to admit though, that sewing with stripes scares the jeepers out of me!  So I had a tough time deciding what to do.  I initially though, HEY! I’ll do a bag.  Ha.  Surprising huh!  Well then I decided I would do a small lap quilt as I had a pile of various flannelette pieces.  Nixed that.

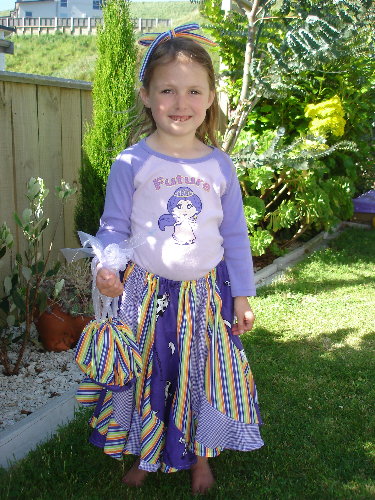
In the end, I made a skirt, a drawstring bag and a headband.

ugly-fabric-swap-full-set1

These are often referred to as Swirly skirts or Redondo Skirts.  I did it from a pattern on YouCanMakeThis.com, which has a great selection of downloadable patterns for sale.

I normally wouldn’t mix fabric weights, but the gingham check is a lightweight woven cotton from my stash.  The cow print is another flannelette from stash, and was a great match for the overall skirt.

Here is another one, that better shows the skirt.

ugly-fabric-swap-holding-skirt1

As for the fabric I sent, I feel horrible.   I tend to not buy things that don’t fit my personal tastes, so couldn’t find anything from stash that I thought was ugly perse.  So I bought some clearance fabric for my swappee person, only it really IS ugly fabric.  And in return, she made miss KT5 a skirt.  Touche.

ugly-fabric-swap-esther

The night after KT5 received her skirt, KM7 and KT5 were having a conversation about said skirt deciding it was such a beautiful skirt.  KT5 loved it so much, that she even slept in it.  Um, ok.

Read Full Post »

The Thrown Together Dalmation Costume

KJ9 was invited to a Fairytale Book character birthday party for one of her best friends, and decided she wanted to go as a Dalmation.  She was absolutely determined that I would make her a dalmation costume.  Um, slight problem though, as I’ve never done pants or a hoodie.

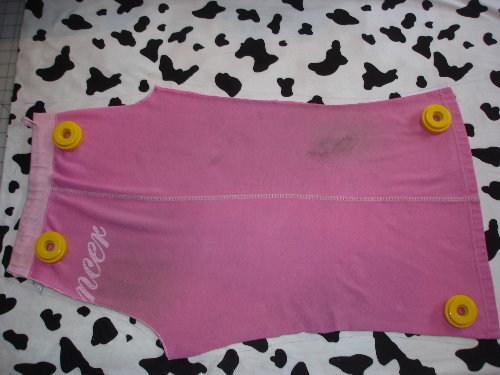
So, I did what anyone would do without a pattern, and winged it.  I took too small and well loved pants and hoodie, and chopped them up.  I then *tried* to make a larger pattern. That was where the *winging it* part came in.

dalmation-pattern-creation

So , after some improvising, since I ran out of fabric, and my pattern wasn’t quite right, I managed to product this in less than 2.5 hours.

dalmation-front

I was VERY lazy, and only used white thread too.  The rest of the errors are for me to know about, and no one else to notice 😉

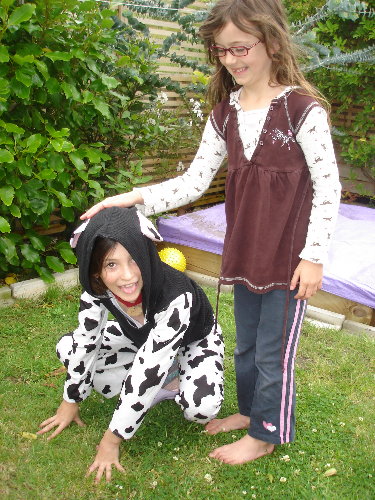
A few more pics.  One of the back and one of KM7 petting the Dalmation

dalmation-back

dalmation-pet

Being made out of suedecloth and microfleece, I can’t imagine it was very comfortable to wear in the hot weather we had this weekend.  However, the girl was quite pleased about it, if you couldn’t tell from the pics.

Read Full Post »

Meet “Sally”

I’m running another bag swap on TNN, like I did earlier in the year.  We decided to do it now, so that we all get new bags for Christmas.  So I’ve been hunting and searching and googling, trying to find just the right bag to make.

Then I found this bag pattern for sale.  I left it open in a window on my computer for 4 days.  I decided, right, I can definitely make that, and I don’t need a pattern to do it.

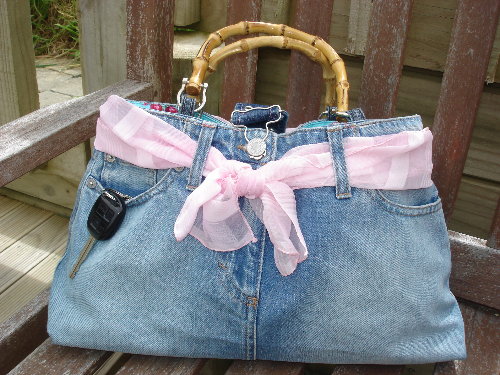
So I made a visit to the Salvation Army store and found this skirt, for $4. Bargain, as it’s a Benetton skirt too!

bag-sally-the-skirt

I did a bit more rummaging, and found a scarf for $2 too.  I had some bag handles stashed away that I rescued from a hideous old bag I found at the Sallies many months ago.  Snatched a belt from my daughter’s drawer that has long been unused, a buckle and fabric from the stash, and got to work.

This was going to be a tutorial, but doh, I took exactly ONE picture during the process.  I think I need to recharge my memory.

bag-sally-in-progress

And turned it all into this:

bag-sally-from-the-front

I’ve named her Sally, since that’s basically where I got everything I needed to make her.

A couple more pics.

bag-sallts-bum

It’s not really lopsided, just slouching a bit.

And the lining, including pockets along both sides.

bag-sally-from-the-inside

And just because my helper is so adorable.

bag-sally-kr

So, now that’s Sally is done, I can’t bear to part with her, and have already started using it. Finally, I have a bag that I don’t have to dig for my keys or my phone.  Just like in my pants, the keys are in the right pocket and the phone is in the left.  Gotta love it!

Read Full Post »

The Manly Lunch Bag

I organised a Bag Swap on TNN a little while ago.  I am WAY slack.  But as I mentioned in my last post, I was almost done.  It just required two things: getting the pattern out of my head AND cleaning the craft room.  Well, I’ve done both, and found my sewing machine in the process!

The person I am gifting to is the husband of the TNN Member, and he was looking for a lunch bag. So I sat down and sketched out my design and came up with measurements to fit around the drink bottle and plastic container I bought.  Because I wanted to do a lunch bag in a messenger bag style instead of a traditional fold-over lunch bag, I wanted to make it as gender neutral as I could.  That way, if the DH doesn’t think it’s manly enough for him, at least the TNNer can use it, right?

After a few muck ups like:

  • remember to measure twice and cut once.
  • Mark your cut pieces so you sew the correct pieces to each other.
  • Some fabrics just HAVE to be overlocked if you are going to make anything durable out of them.

This is what the bag turned out like.

This is a slightly closer view.  Thanks to my crappy a$$ camera and the type of thick cotton woven fabric, the pictures look a bit psychodelic.

Once you open the flap, there are two snappable pockets that can be used for utensils or napkins, or even a cell phone or ipod.

And a little peek inside.  You can see how the lunch box and drink bottle fit in nicely, with a little room to spare.

I completely munted the lining, so had to do a second take on that, which grumble grumble grumle means that I had to use a different fabric than what I had on the flap lining, but that’s ok as I think it looks heaps better.  And I would make the shoulder strap less wide as well, but for a manly man, with big shoulders, big is good, right?

The best part of this bag?  It is made COMPLETELY from stash.

*Waits for reader to pick themselves up off the floor*

That’s right folks!  I didn’t have to buy one. single. thing. to make this bag!  That feels good.

Will be posted off tomorrow, and here’s hoping the recipient will think it’s manly cool too.

Read Full Post »